Pages

Tuesday 31 July 2007

Instructions for August Sketch


Here is the way that I have done the layout:-

Photos
1 = 8.5 cm x 7.5 cm
2 = 9.5 cm x 14.5 cm
3 = 10 cm x 7.5 cm

Matt
1 = 9 cm x 8 cm
2 = 10 cm x 15 cm
3 = 10.5 cm x 8 cm

Blocks/Shapes
1 = 3.5 cm x 7 cm
2 = 8.5 cm 7.5 cm
3 = 8.5 cm x 7.5 cm
4 = 6 cm x 8 cm
5 = 10 cm x 7.5 cm
6 = 9.5 cm x 14.5 cm
7 = 6cm x 7 cm
8 = 8.5 cm x 7.5 cm

I have used Colorbok - Flavia - Peaches and Pomegranates Punch Out Pack. All title letters are from this pack.
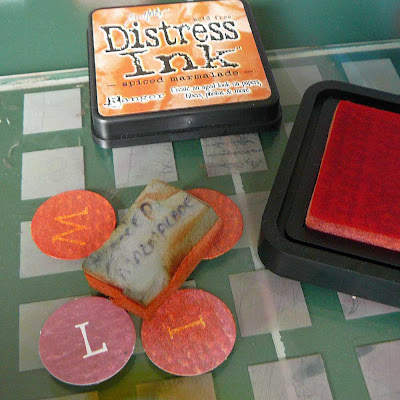
I used Tim Holtz - Spiced Marmalade and Pine Needles
A compass, double sided tape and a black pen.
8 brads/eyelets (I only used 7 in the end).

I picked out 3 photos that I wanted to use. Re-sized them and printed them out!

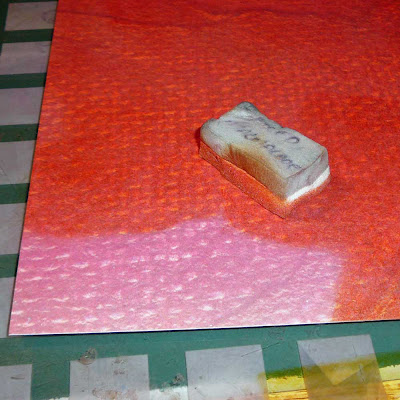
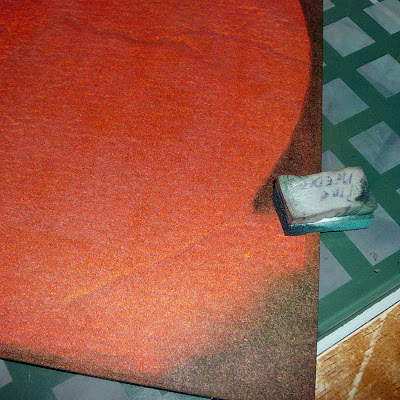
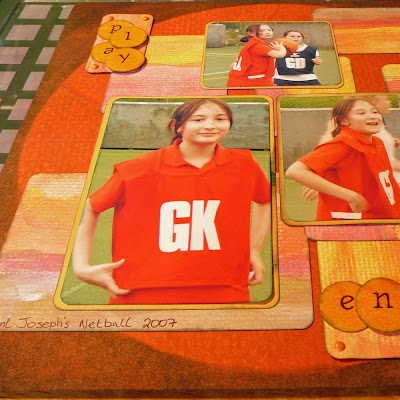
As I was looking through the punch out pack of the sheets of paper looked like it had the texture of a netball, but it was a winey colour, so I used Spiced Marmalade and some cut 'n' dry foam to ink the whole of the 12"x12" paper. It looked okay (phew!!!!!).


I then picked out a contrasting colour for the blocks of paper.
Then a plain paper for matting the photos.


Next I cut all the blocks and photo matts. Then I used a corner punch to round the corners of the photos, blocks and matts. The edges are inked with Pine Needles.


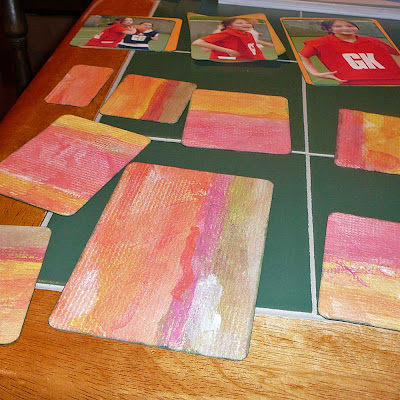
Once that was done I planned out my page by placing all the pieces down on the backing page (netball one), I drew a rough sketch on scrap paper and numbered each block 1-8. I took the pieces back off and put the corresponding number on the back of them. I inked around the edges of the backing page, and laid the pieces back down, the edges that I inked looked really messy.


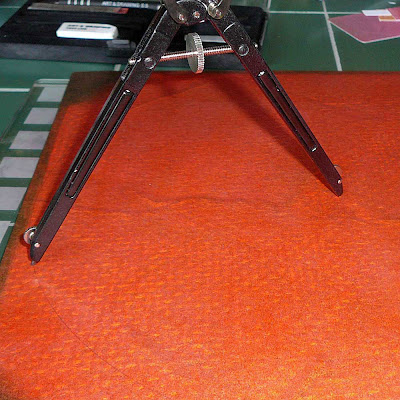
I suddenly thought d'oh!!!!!! use a round shape cause of the netball theme.. I used a compass to get the big circle, and inked with Pine Needles up to the pencil line. Put the pieces back down and it looked OK.


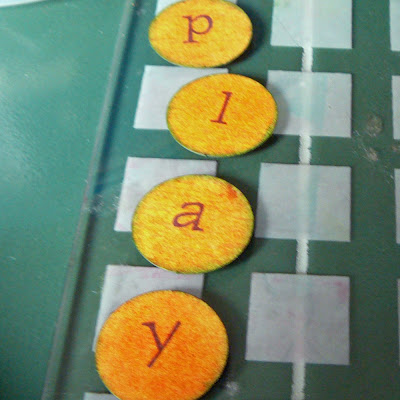
When I was happy with the page, I put double-sided tape on the back of every piece. I put the brads into the blocks. In the punch out pack there is 4 pages of alphabet's I decided to use these as the were already rounded: I inked them up with Spiced Marmalade to get them to blend in with the page. I also coloured in the actual letters with a black pen, as I didn't think the letters stood out enough. I stuck them down on the blocks that I wanted to use.


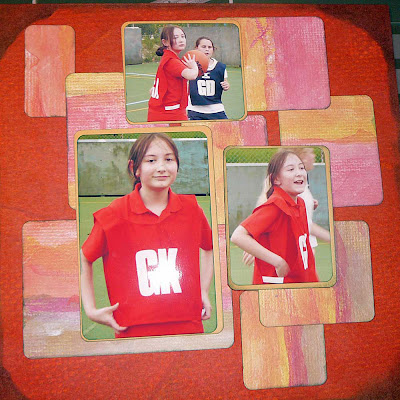
I then stuck down the bottom layer (using my numbered rough sketch), then the middle and then the top.


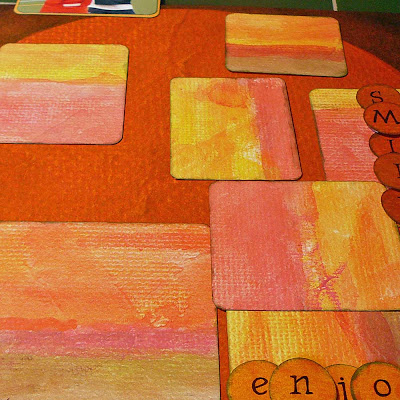
I added journaling onto some of the blocks as they were very plain.


Voila!!! Page completed. If you can't follow my instructions, please leave a post here or on the forum, or e-mail me. I will only be too happy to help. Good luck and I can't wait to see the finished pages.


July ATC Swap


Here is my swap for July. The theme was Sewing.


I searched Google for free sewing patterns, I found this pattern for dolls clothes, downloaded and printed off the pattern picture. I then cut it down to size.

I then searched for sewing sayings - I picked this one as it relates to all crafts. "Sewing and crafts fill my day not to mention the living-room, bedroom and closets". I printed the saying in size 10 font. I trimmed around the saying.

I then glued both the image and the saying to an ATC card using a glue stick.

Distressed both with Tim Holtz Vintage photo ink pad.

To cover the join between the two, I hand sewed with gold thread.

I then hand sewed 3 buttons onto the card using the same gold thread.

Sunday 29 July 2007

Paper Paradise August Sketch Challenge


Here is the layout that I am using for the Paper Paradise August Challenge.
Join in if you want everyone is welcome.

Thursday 26 July 2007

My Scrapbook Area

This is where I craft from, which has to be tied away every night, (unless we are getting take away and then its plates on trays on knees), as it is our kitchen table where we eat our meals.


The big grey container is where I keep all my glues, foam tape, double-sided tape, etc. The toolbox is my toolbox I keep all my scissors, pens, pencils, piercing tool, etc. The baby wipe box is my table top rubbish bin. The colourful boxes I robbed from Chloe when she was finished using the crafting materials that came in them I use them to store my precious inks, Tim Holtz, Brillance, Cats eyes, dew drops, etc. The little containers with lids hold some of my brads and eyelets. My craft mat is a glass chopping board that I robbed off of the kitchen side (I bought another for the kitchen.


What is your crafting space like, are you lucky enough to have an area all to yourself that you don't have to tidy away all the time, my biggest wish a little craft room all to myself, wish those damn numbers would come up in the lotto. Don't need a lot maybe one million, see I'm not too greedy. LOL

Bye

First School Photo


This is the Page that I am putting forward for Tracey's sketch Challenge on Paper Paradise Forum
I am also going to enter it in a challenge on scrapbook.com.

I couldn't find Rusty Pickle's Blackboard Paper, so I made my own using Bazzill Black Paper, Sakura white pen, (all bought at Paper Paradise)ruler and emery board. First I cropped the paper down to the size I wanted, then drew full straight lines and dashed lines alternatively 10 cms apart. I then drew in the letters freehand. Good for a first effort I think. I then rubbed an emery board over the whole page, it gave the white writing a bit more of a chalk feeling.


The flower I used was inked totally with Brillance dew drop red rocket, I got the flower in a charity shop which I stripped from a larger bunch of flowers. The heart die cut was in one of the £1.00 lucky bags that I bought at the Pink Rose Appeal Auction held by Paper Paradise a few months back.


The blackboard and books are from Crafty Bits, the colouring pencils are buttons all these were got at Boyles.


I wrote Aimee's name on the school books, can't see it on the photo of the page, tried everything to avoid flash, on the Aimee's face and because the book has a shiny surface it also got flash. I took this photo by turning off the flash sorry the photo is more clear, cause of the material that the books are made of it is very hard to take a photo, also it is very small.


The ribbons were got on the market. Papermania eyelets and Woodware gold brads. I can't remember who makes the swirly heart brad.


The title was made by getting a free font from DA Font (thank you Lazy Kay), printed out, putting an sheet of lined paper over it and tracing the letters with a black pen. (my witting would never be as good as that). I also used 2 gold brads to look like thumbtacks.


I think that's it.

If you have any questions please don't hesitate to ask :)

Monday 23 July 2007

Harry Potter


I bought the new Harry Potter book for Chloe on Staurday at about 12:00 pm. I have now finshed the book tonight at about 10:00 pm. Hehehe! I love those books I can never put them down once I get started :) If I gave the book to Chloe first, it would of been months before I got my hands on it, there is 607 pages in it. Anyone else a Potter freak???

Thursday 19 July 2007

Missed out on sketch challenge


This is a layout that I wanted to enter in a sketch challenge in scrapbook.com hosted by Q-Diggity but unfortunately, LIFE got in the way again, and I didn't manage to get it uploaded on time :( This page is for Aimee's album. I have used the same photo for Chloe's album but with a different layout, I really like the photo if you haven't guessed already!!!!! Steve took the photo and it shows that the girls really do love each other.
The quote reads:

She is your mirror, shining back at you with a world of possibilities. She is your witness, who sees you at your worst and best, and loves you anyway. She is your partner in crime, your midnight companion, someone who knows when you are smiling, even in the dark. She is your teacher, your defence attorney, your personal press agent, even your shrink. Some days, she's the reason you wish you were an only child. ~Barbara Alpert

The circles of paper are cut using Making Memories circle cutter, the black floral swirls are doodled on using a free template from Scrapbook Inspirations, all the edges are inked using color box cat eyes bronze or old rose. the fabric flowers are from a charity shop that I stripped down. the brads in the middle of the flowers are Papermaina pearl. Gems I have hundreds of them bought all over the place. The skeleton leaves are from LP creative, the flower charm from nunn.design, the card stock is bazzill, the paper on the rim of the circle is Old World Stack - DCWV, the inner circle paper is Love me tender from Basic grey. The quote is printed on parchment paper, the title is cut by hand.

The layout is actually very simple, inking edges, layering paper, cutting, gluing and poking (holes for the brads LOL). The doodling was the hardest as I didn't want to commit myself to drawing on paper, so behind the circle of paper is a mess, trying different pens, (i used Poilot Hi-Techpoint to outline, and a Stabilo to fill in), trying the design lol.

When I actually stuck down the title, I realised I should of inked the edges of the S a bit more as it gets kinda lost :( awwh well, live and learn :)

I must get my layouts done quicker to enter these challenges!!!!!

Thursday 12 July 2007

I entered a CHALLENGE

I just entered a challenge in Scrapbook.com JULY MULTIPLE PICTURE CHALLENGE in the 4-5 category. Under the name Helena P This will be the first ever challenge outside of Paper Paradise's forum. I'm nervous, isn't that so silly, took me ages to finally upload a layout for the challenge. I used my layout from the scrapbook workshop: MILLY

Just wait to see what happens now.

Tuesday 10 July 2007

Workshop Pages Finished

12 July 2007
I just checked into my Blog, and where are my images gone?????? Thank you Tracey for letting me know!!!!!

I have now uploaded them again, hopefully they will not disappear again!!!

Original Post

Well here they are finished. Spent a long time getting them done, Tracey knows exactly how long ;).

Hope you like them, all comments welcome.
Helena


The little plaque reads: Time has nothing more beautiful to give than love.
This page will be for Aimee's album. On the back of the tag I have put some journaling for Aimee to read when she is older, on how her big sister could not wait to meet her.


This is my brother and his girlfriend


The tags read top daydreams, bottom beautiful.


The three words across the envelope read: treasure, family, cherish
This my little family on two big occasions for Chloe (Communion) and Aimee (Christening)


This is my husband's niece.
The tag on the folder reads Cherish the tag on the page reads loveliness


This is the little folder opened out the wording reads:
There is loveliness in the world and you are part of it

This is the accordion book opened out the wording on the cover reads:
To hold dear Cherish treat with affection and tenderness


The tags read Happy Journey

Sunday 8 July 2007

Scrapbook Workshop - Paper Paradise

What a fantastic day I had today. I spent the day with Sue and eight other scrappers in Paradise Studio making scrapbook layouts.
Sue gave us a pick of a Themed Colorbox 12x12 punch out pack, then a choice of any 12x12 album in the shop and a choice of one overlay (there was 5 to choose from). What a choice. Sue had created 6 pages for us to make. We got to page 4 and we had very little time left, so it was decided that we would make the tricky bits, pick out our embellishments and finish it off at home. We got to keep whatever was left (which was quite a lot) in our punch out packs.

We had so much fun!!! A full day of scrapbooking, with no interruptions except for lunch. Absolute PARADISE!!!!

I have just finished adding the embellishments to
my pages, only the photos to add now. Here are the pages without photos once I get the photos added I will post the pages.

THANK YOU, THANK YOU, THANK YOU, SUE xxxxx
Helena


Sunday 1 July 2007

June's ATC Swap


Here is my ATC for June's swap at Paper Paradise


It mightn't look it, but a lot went into it, I made 7 in total.

First of all I didn't want to make any of the cliches, time flies, time is precious etc.

Aimee and me were singing nursery rhymes walking home from school, and Aimee picked this one, so I thought it might make a good ATC.


I coloured some cream card with Tim Holtz antique linen and antique photo. Then made a template of a grandfather clock. Cut out all the shapes to layer them. The clock face is a pocket watch stamp embossed in gold on a platinum background. A circle cut out of the first layer of the clock. Acetate placed at the back, stuck the clock face underneath and then stuck to the back layer.

The body of the clock is done by having two layers of card, with a rectangle window cut out of the top layer, a gold brad and a length of gold peel off. Acetate stuck under the window layer, foam pads to raise it, stuck to the bottom layer, a gold circle peel of for the handle.

The base made of two pieces of card cut to shape with foam pads under the first layer. Mouse stamped with versamark and embossed with silver.

The rhyme stamped out and cut separately, with green ink stamped lightly over the words.

The background paper was a scrap piece I had left over, can't remember the name, stuck to an ATC card.

Face of clock stuck to background using foam pads, body stuck straight down, bottom layer of base stuck straight down, top layer stuck with foam pads with body sandwiched in between. Mouse stuck down with foam pads. Words placed randomly and glued down.

Quite a lot for a little card!!!!!